

If you've ever tiled a space, you know that finishing those sharp edges can feel like the make-or-break moment of the whole project. Mess up the trim edges, and even perfectly laid tiles will look unpolished, prone to chipping, or just plain awkward to clean. As an aluminium tile trim supplier, I've seen way too many DIYers and even some contractors skip proper edge finishing, only to come back a week later frustrated by cracked tiles or uneven walls. Today, I'm breaking down the most practical, long-lasting ways to finish aluminium tile trim edges, with the exact products I stock to make this part way easier.
First, let's get one thing straight: aluminium tile trim isn't just a decorative afterthought-it's a protective barrier. Those raw tile edges are super fragile; without a metal trim, they'll chip the second you brush a heavy mop against the wall, or get scuffed by furniture moving in. But the problem comes when you have to wrap up the end of the trim, whether it's around a corner, along a wall that stops short, or between two different tile materials. Let's start with the most common edge finish: wrapping around external corners.
External corners are everywhere-where two walls meet at a right angle, like in bathroom showers, kitchen backsplashes, or hallway tile runs. If you cut a standard straight aluminium tile trim to fit a corner, you'll end up with a gap or a sharp, uneven joint that looks messy. That's where a Tile Corner Bead Aluminium comes in, it's pre-formed to fit 90-degree external corners, so you don't have to fumble with cutting angles that end up wrong. Wait, don't make the mistake of trying to bend a straight trim by hand-aluminium is rigid, and forcing it will cause kinks that break the seal with your tiles. The pre-formed corner beads are designed to slide right into the edge of your tiles, and their flanges are made to hold grout in place, so no gaps get left behind. I always recommend these for corners because they eliminate the need to cut mitre joints, which even pros mess up sometimes. For internal corners, you can actually use a standard straight trim and cut it to butt up to the other wall's trim, or if you want a seamless look, you can use a flexible trim to curve it slightly (more on that later) to fit the internal angle, but pre-formed internal corner trims work too, if you look for the right profile.
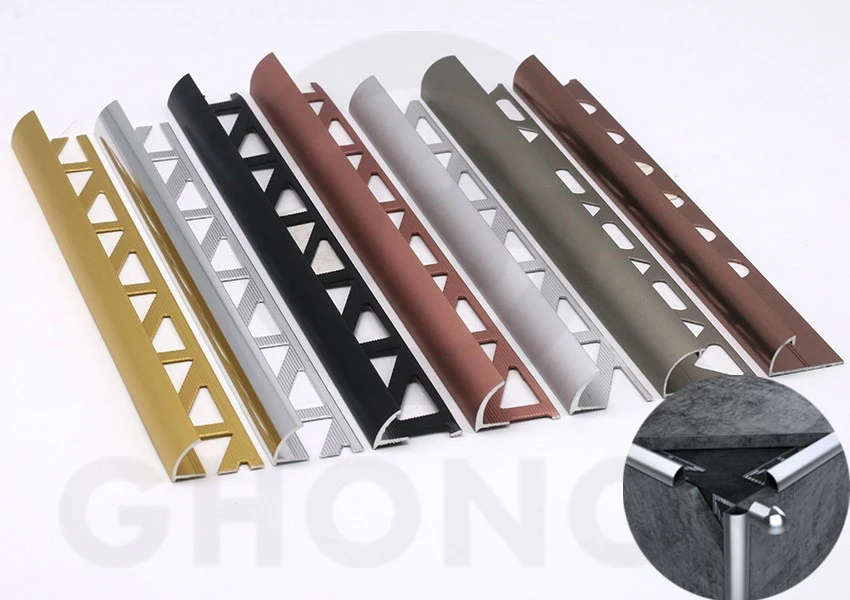
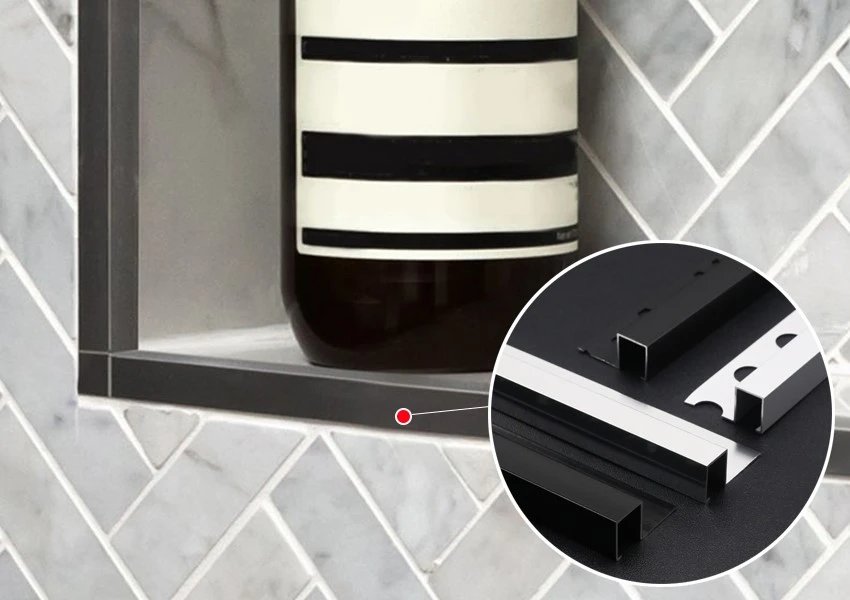
Next up: finishing straight runs that end, like along a wall that stops before a door frame, or at the edge of a tile area. The biggest mistake here is just cutting the trim off flush with the last tile, which leaves a sharp aluminium edge that can cut someone, or gets scratched easily. There are two solid options for this, depending on the look you want. First, if you want a clean, flat finish, Wall Panel Edge Trim is perfect. These are designed to be recessed or flush with the last tile, so when you cut the trim to length, you can either leave a tiny gap (1-2mm) to caulk, or use a end cap that fits the trim's profile. Wait, a lot of people forget that aluminium tile trims come with matching end caps-if you're buying your trim from a supplier, always ask if they have end caps for your specific profile. But if you don't want an end cap, another option is to use a thin piece of metal to cap the end, but that's more work and doesn't look as neat. The Wall Panel Edge Trim I sell has a rounded edge option, so it's not sharp, which is great for homes with kids or high-traffic areas.
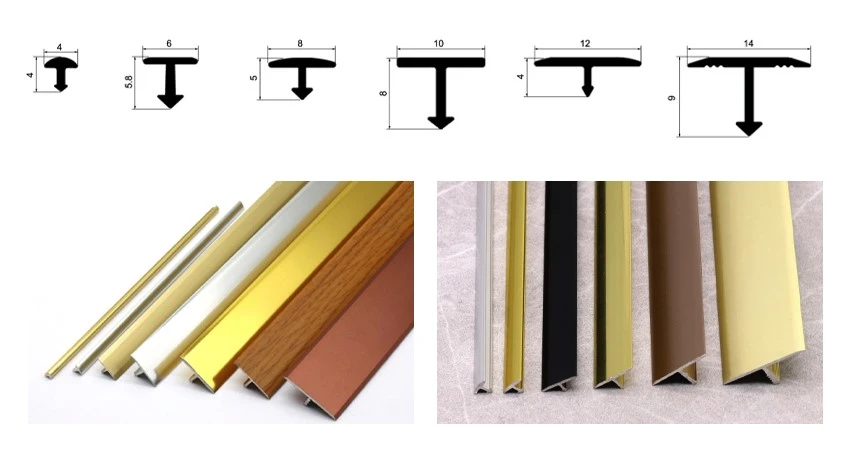
Another edge finish that's super useful, especially for transitions between tiles or tiles and other surfaces like wood or laminate, is T-shaped trims. If you have a floor tile that meets a wood floor, or two different tile heights, an Aluminum T Shaped Tile Edging Trim creates a smooth, safe transition so no one trips, and it covers the uneven edge of the tiles. Wait, don't confuse this with an Aluminium T Shape Trim that's just for wall edges-no, the T-shaped ones for transitions have a wider top that sits between the two surfaces, and the flange clips onto the edge of the tile. I've had so many customers tell me these saved their bathroom renovations when the floor tile was a little higher than the vinyl flooring they installed next to it. If you're tiling a backsplash that meets a countertop, a T-shaped trim for vertical edges works too, covering the cut tile edge so it doesn't catch on dishes or cleaning cloths.
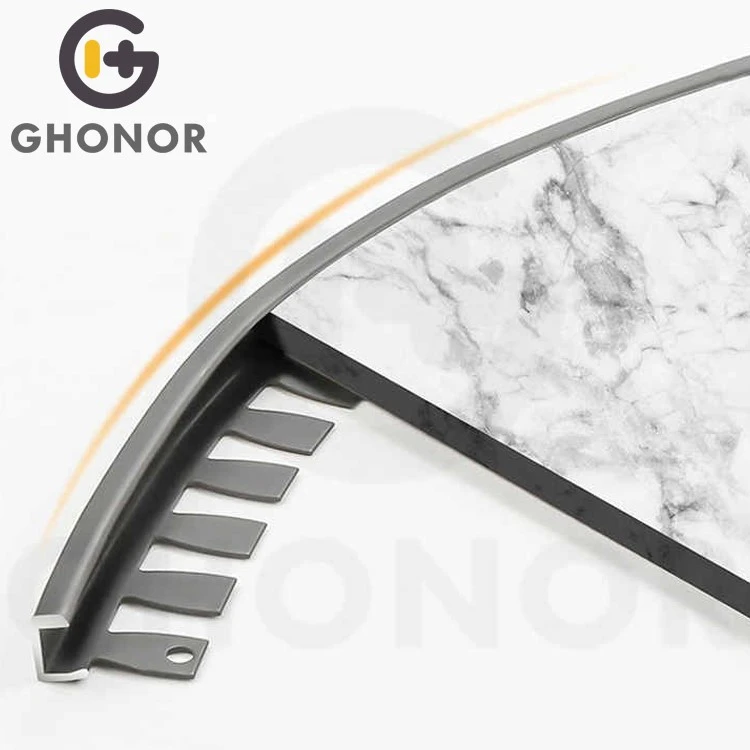
Now, what about curved edges? Like, if you're tiling a round shower niche, or a curved wall in a custom vanity? Straight aluminium trim won't bend evenly, and cutting it to curve will leave gaps. That's where a Flexible Tile Edging Strip comes in. These are made with a thin aluminium core and a soft polymer coating, so you can bend them to fit gentle curves (not super tight spirals, but anything with a radius of 10cm or more works). The best part? You can cut them to the length you need with regular scissors, no special tools, and they hold their shape once bent, so you don't have to worry about them springing back. I always keep these in stock for customers doing custom tiling, because they eliminate the need to make messy cuts on straight trim to fit curves. One tip: when you use flexible strips, make sure to press the flange firmly into the tile adhesive so it sticks evenly-don't just press it against the grout, because it will pull away over time.
Wait, let's talk about the do's and don'ts that I've picked up from years of being an aluminium tile trim supplier, because these small tips will save you so much frustration. First, always measure twice, cut once-for straight trims, even a 1mm mistake in length will leave a gap that grout can't fill, or the trim will overlap tiles. For corners, pre-formed corner beads are designed to fit standard 90-degree walls, so if your walls are out of plumb (which most are, especially in older homes), you can sand down the flange slightly to get a tight fit. Second, don't use silicone caulk as a substitute for a proper edge finish. Caulk is great for filling small gaps, but it won't protect the tile edge like a metal trim will, and it will yellow over time, making the whole project look old. Third, for external corners, don't cut the mitre to 45 degrees and try to fit two straight trims together-unless you're a super experienced tiler, that joint will be uneven, and grout will crack there in a month. Pre-formed corner trims are there for a reason, they're engineered to make that corner look seamless.
Another thing: finishing edges isn't just about looks, it's about durability. I've seen tiles chip within 6 months because someone skipped the trim edge, and they had to re-tile the whole area. Aluminium tile trim edges are built to withstand impacts, moisture, and everyday wear, so finishing them properly means your tiling job will last 10+ years, not 1 or 2. For wet areas like showers or bathrooms, make sure the trim you use is corrosion-resistant-all the trims I stock are anodized aluminium, which won't rust or discolor, even in high-moisture spaces. If you're finishing an edge outside, like a patio tile area, look for a thicker gauge trim, but the same principles apply-use corner beads for corners, flexible strips for curves, and end caps for straight runs.
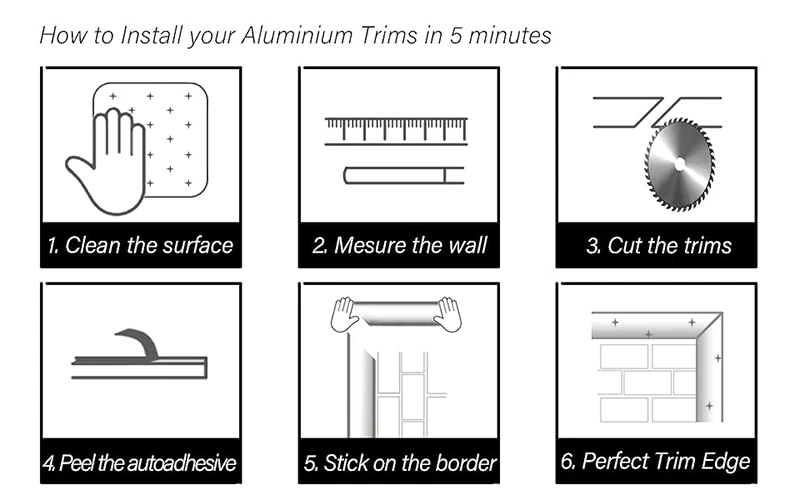
Now, let's walk through a quick step-by-step for finishing a simple external corner, just to make sure it's clear. First, measure the height of your tiles, add 5mm to that (for the trim to sit slightly above the tile, so you can wipe it clean), then cut the Tile Corner Bead Aluminium to that length. Next, apply a thin layer of tile adhesive to the back of the trim's flange, then press it onto the edge of the first wall's tiles, making sure it's plumb (use a level!). Then, take the matching corner bead for the adjacent wall, apply adhesive to its flange, press it onto the second wall's tiles, and fit the two corner beads together at the corner. Wipe away any excess adhesive with a damp sponge, let it dry for 24 hours, then grout the tiles, making sure to fill the gap between the trim and the tiles completely. Once the grout is dry, you can add a thin bead of silicone caulk between the trim and the wall (not the trim and tiles) to prevent water from getting behind the trim in wet areas. That's it-no messy cuts, no uneven joints, and it will look clean for years.
For a straight run that ends at a door frame, here's the quick process: measure the distance from the last tile to the door frame, cut a Wall Panel Edge Trim to that length, use a end cap that matches the trim's profile (again, ask your supplier for these-they're not always included), slide the end cap onto one end of the trim, apply adhesive to the trim's flange, press it onto the last tile, and wipe away excess adhesive. Once it's dry, you can caulk between the end cap and the door frame to fill any small gaps. This leaves a smooth, non-sharp edge that won't cut anyone, and it looks way more professional than just cutting the trim off flush.
Now, if you're tackling a curved edge, like a shower niche, the flexible trim process is super simple: measure the length of the curve you need, cut a Flexible Tile Edging Strip to that length, bend it to fit the curve (you can even heat it gently with a hair dryer if you need a tighter bend, just don't overheat it, since that can damage the polymer coating), apply adhesive to the flange, press it firmly along the curve, and hold it in place with painter's tape until the adhesive dries. The flexible strip will stay curved, and since it's continuous, there are no seams that can crack or chip. I've had customers use these for round kitchen backsplash edges too, and they look way better than trying to cut straight trim to fit a curve.
If you're still unsure which trim is right for your edge, don't stress. As an aluminium tile trim supplier, I get questions every day from DIYers and contractors who aren't sure which product fits their project. The key is to match the trim's profile to your tiles-so if your tiles have a 10mm thick edge, make sure the trim's flange is wide enough to hold that, and the top profile matches the tile's surface. For example, if you have a bevelled tile, look for a trim with a matching bevelled edge, but if you're just finishing a square edge, a standard straight trim works.
The biggest takeaway here? Finishing aluminium tile trim edges doesn't have to be complicated. You don't need fancy tools or years of tiling experience-you just need the right product for the job. Whether that's a Tile Corner Bead Aluminium for sharp corners, a Wall Panel Edge Trim for straight runs, an Aluminum T Shaped Tile Edging Trim for transitions, or a Flexible Tile Edging Strip for curves, there's a product designed to make that edge look clean and last.
If you're working on a tiling project and need to pick the right trim for your edge, feel free to reach out to us to chat through your needs. We can help you measure, find the right profile, and even give tips for installation so your project turns out exactly how you want it. Don't let messy edges ruin your hard work-finishing them properly is worth the extra 10 minutes, and it will save you from headaches down the line.
References
- Tile Installation Best Practices: Edge Finishing Techniques, Tile Association International, 2022
- Aluminium Tile Trim Material Science: Corrosion Resistance for Wet Areas, Metal Building Materials Journal, 2021
- DIY Tiling Project Tips: Choosing and Using Tile Trim, Home Improvement Trade Review, 2023
- Flexible Tile Edging Performance Testing for Curved Surfaces, Construction Materials Testing Laboratory, 2022