

Hey everyone, it's Jake here, from your go-to Aluminium Tile Trim supplier. Today, I'm tackling a question I get ALL the time from contractors, tile setters, and even DIY homeowners who just finished a bathroom or kitchen reno: Can aluminium tile trim be used for backer board edges? Short answer? Heck yes-but there's a right way to do it, and a lot of folks skip the details that make it work (or end up with a messy, failing edge). Let's break this down like we're on a job site, no fancy jargon, just the real talk you actually need.
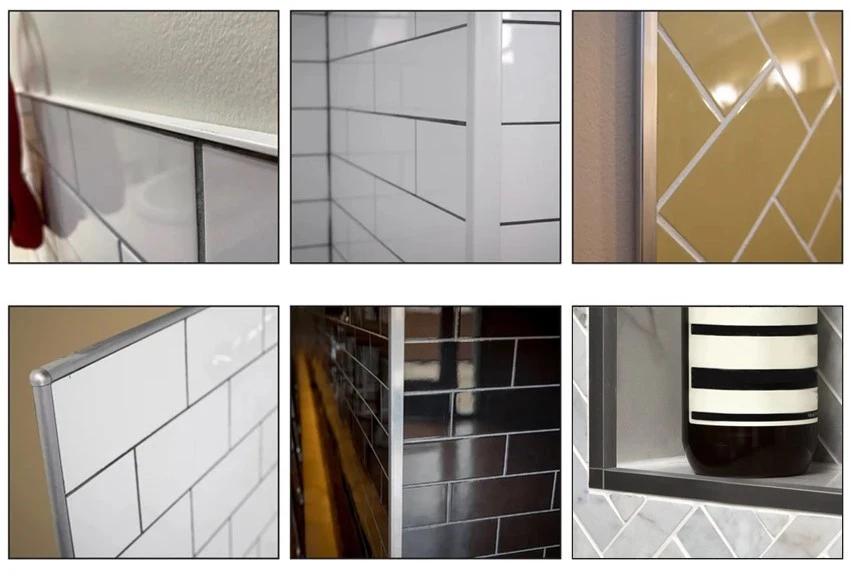
First, let's ground this in what backer board is, because that's half the battle. Backer board (usually cement board or Durock) is the tough, water-resistant base you put down before tiling in wet areas-think showers, backsplashes, floors. Its edges are sharp, super prone to chipping when you cut it, and if you leave them exposed, they'll soak up moisture over time (even with a waterproof membrane) and start to crumble. That's where tile trim comes in, but a lot of people assume trim is just for covering tile ends. Nope-it's also for protecting the backer board, smoothing transitions, and making your whole install look professional.
Now, why aluminium? It's lightweight, rust-proof, holds up to wet environments better than metal like steel or brass, and way more flexible than, say, plastic trim. The question is, can it work specifically for backer board edges? Let's dive into the nitty-gritty of how this actually works, because it's not just slapping trim on and calling it a day.
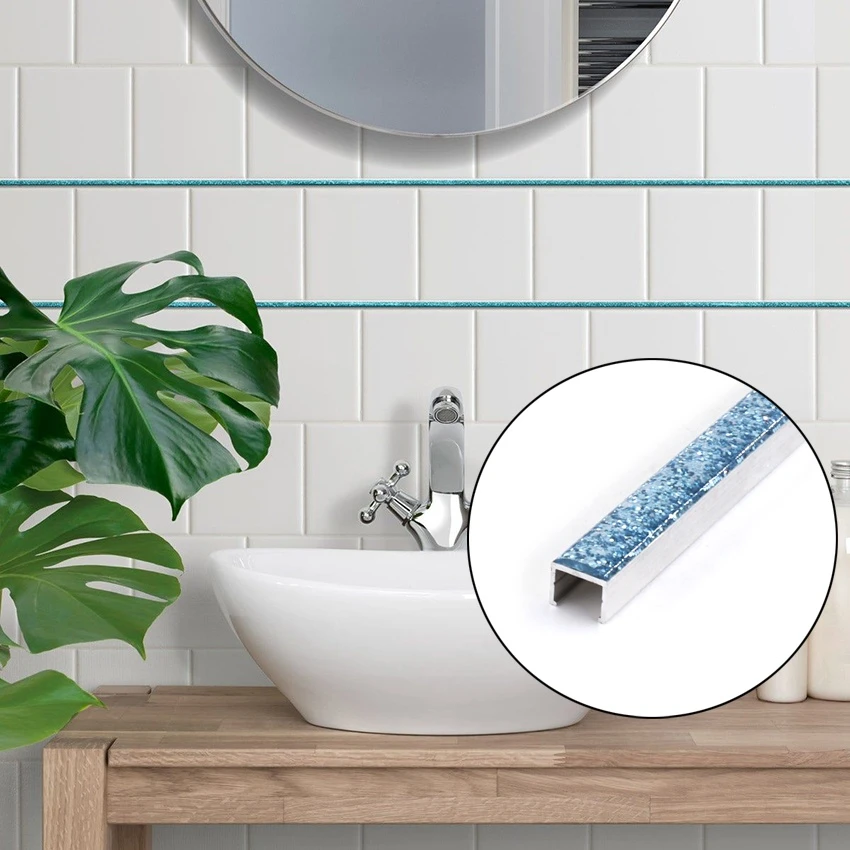
First, let's talk about the types of aluminium trim that work best here. Not all trim is created equal. For backer board edges, you need trim that can cover that board thickness-most standard backer board is 1/4" or 1/2" thick, so the trim's leg has to fit snugly over that. My top picks? L-shaped aluminium trim is a no-brainer here. Wait, let me link that exact page we have: L Shaped Aluminium Trim. That page has different leg heights, so you can get one that lines up perfectly with your backer board and tile. Why L-shaped? One leg goes over the face of the backer board, the other is where the tile locks in-creates a seamless seal. Also, if you're doing something with a little sparkle (super popular for accent walls now), our Glitter Listellos-Glitter Listellos? Wait no, wait the link text is Glitter Listellos, right-yes, that trim has a glitter finish that works equally well on backer edges, especially for vanity backsplashes where you want a pop without going overboard.
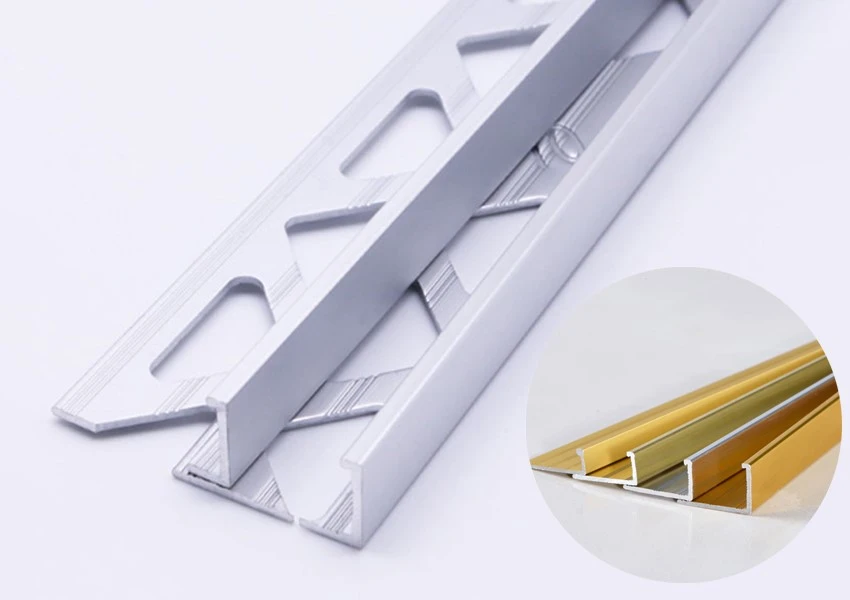
Wait, but what if your backer board edge is a transition between two different surfaces? Like, say, a bathroom floor where backer board meets wood subfloor? Then a Metal T Shaped Tile Edging Trim is perfect here. That trim covers the backer board edge on one side and transitions smoothly to the floor on the other. I see so many guys use wood or plastic transitions here that warp or chip-aluminium is solid, so it won't move with temperature shifts. And if you need straight edge protection, Glitter Tile Edging is another option, it's thin but rigid, fits right over backer board edges without extra bulk.
Now, let's get to the how, because this is where most people mess up. First step: when you cut backer board, sand the edges a little to get rid of any loose cement dust-aluminium adheres way better to a clean surface. Next, you have to use the right adhesive. Not regular tile mastic-wait, no, actually, a thin-set mortar that's specifically for cement backer board and metal? Wait, no, just polymer-modified thin-set works fine. You don't want something that's going to corrode aluminium, which regular mastic might if it's not polymer-modified. Then, you apply a bead of thin-set along the backer board edge, press the L-shaped trim (or whatever type you're using) into it, and make sure it's level with the backer board face. Wipe off any excess thin-set right away with a damp sponge-if you let it dry on the aluminium, it's a pain to remove and can leave a spot.
Wait, another thing: do you need to put waterproof membrane under the trim? Yes, even with aluminium trim. Backer board edges are still the weakest spot in wet areas. You should apply your waterproof membrane over the backer board, then fold it over the trim's leg that covers the backer edge, then tile right up against the trim's tile side. That creates a continuous waterproof barrier, no gaps. I've seen guys skip that step and have mold grow behind the backer board a year later-don't be that guy.
Common mistakes to avoid: first, buying trim that's too short for the backer board. If your backer is 1/2" thick, get trim with a leg that's at least 5/8" so it covers the whole edge. Don't use trim that's only 3/8"-it'll hang over or leave a gap. Second, using too much adhesive-if you squish it out everywhere, it can seep into the trim's seam and look messy. Third, not allowing the thin-set to cure fully before tiling-wait for 24 hours, minimum, especially in wet areas. If you tile too soon, the trim can shift.
Now, let's talk about when this works best. If you're doing a shower niche edge, that's a perfect spot for aluminium trim on backer board edges. The niche's backer board is cut, sharp, so trim protects it from water and tile chipping. Or a kitchen backsplash where the backer board meets the countertop-aluminium trim covers that edge, no more cracked grout there. Even on floor backer board edges leading to a tile floor, L shaped trim works to keep the edge straight.
Wait, but hold on-can you use this for every backer edge? What about if you have a curved backer edge, like around a window in a shower? Then aluminium trim might not bend enough, so you'd go with flexible plastic, but for straight edges (which 99% of installs have), aluminium is way better. It's durable, easy to cut with a hacksaw or tin snips, and you can paint it? Wait, no, our aluminium trim comes in different finishes, but if you want to match your tiles, you can use spray paint made for metal-just make sure you prep the surface first.
I get so many questions from DIYers who think they can skip trim entirely, but I've seen installs where they did that, and 2 years later, the backer board edge is crumbly, tiles are falling off. Aluminium tile trim isn't just a fancy add-on-it's a critical part of protecting your backer board, which is the foundation of your tile job. And the best part? It's way easier to work with than, say, stone trim. You cut it on site, no special tools, and it's lighter, so you can handle it alone (no more needing two people to hold a big stone trim piece).
Let me throw in a quick real example from last month: a guy called me, he was doing a master bathroom, had cut backer board for the shower base edges, thought he'd just tile right up to it. Tried that, first tile fell off a week later because the edge was so sharp it cracked the tile. He ordered L shaped aluminium trim, followed the steps we talked about, and his install turned out flawless. No chipped tiles, no water damage, looks super clean. That's the win here.
Wait, if you're looking for specific trim sizes, our L Shaped Aluminium Trim page has all the dimensions listed, so you can measure your backer board exactly and pick the right one. And if you want something with a little extra style, Glitter Listellos are great for accent edges, not just plain ones. Even Glitter Tile Edging works for small edges like vanity backsplashes. The Metal T Shaped one is my go-to for transitions between backer and different floor materials.
Now, let's wrap this up: yes, aluminium tile trim is absolutely suitable for backer board edges-when you pick the right type, prep the backer properly, use the right adhesive, and follow the waterproofing step. It's durable, easy to install, and will make your tile job look way more professional, not to mention protect your base for years to come.
If you're working on a reno and need help picking the right trim for your backer board edges, feel free to reach out. We've got all the sizes, finishes, and styles to fit any project, whether you're a pro contractor or a DIYer taking on your first big tile job. No question is too small-we're here to help you get it right.
Oh, and one last tip: when cutting aluminium trim, file the cut edge a little so it's not sharp-no one wants to get a cut on the job site, trust me.
References
- Tile Council of North America. (2021). Tile Installation Handbook: Best Practices for Backer Board and Trim Installation.
- American Ceramic Society. (2020). Properties of Aluminium as a Tile Edging Material for Wet Environment Applications.
- International Code Council. (2022). Residential Building Code: Waterproofing Requirements for Shower and Backer Board Edges.