

If you've ever tripped over an uneven transition between a ramp and flooring while moving a cart, wheelchair, or even just walking, you know how frustrating and dangerous that small gap or height difference can be. As a supplier of Aluminum Floor Carpet Trim, I've spent years helping residential and commercial clients solve this exact problem, and installing this trim on a ramp is one of the most common (and most impactful) projects we assist with. Unlike flimsy plastic or wooden trims that crack under foot traffic or heavy loads, aluminum trim is durable, weather-resistant, and designed to create a seamless, safe transition between the ramp's carpeted surface and adjacent flooring. In this post, I'll walk you through a step-by-step process for installing aluminum floor carpet trim on a ramp, share pro tips I've learned from hundreds of installations, and explain why choosing the right trim type for your ramp matters most.
First, let's start with choosing the right trim for your specific ramp needs. Not all aluminum floor carpet trim is created equal, and picking the wrong one can lead to a wobbly installation, premature wear, or even a trip hazard down the line. When it comes to ramps, you need a trim that accommodates the slight slope of the ramp and creates a smooth, stable bridge between the ramp's carpet and the floor it meets. There are a few key trim types to consider, and our team often guides clients to the best fit based on their ramp's use case.
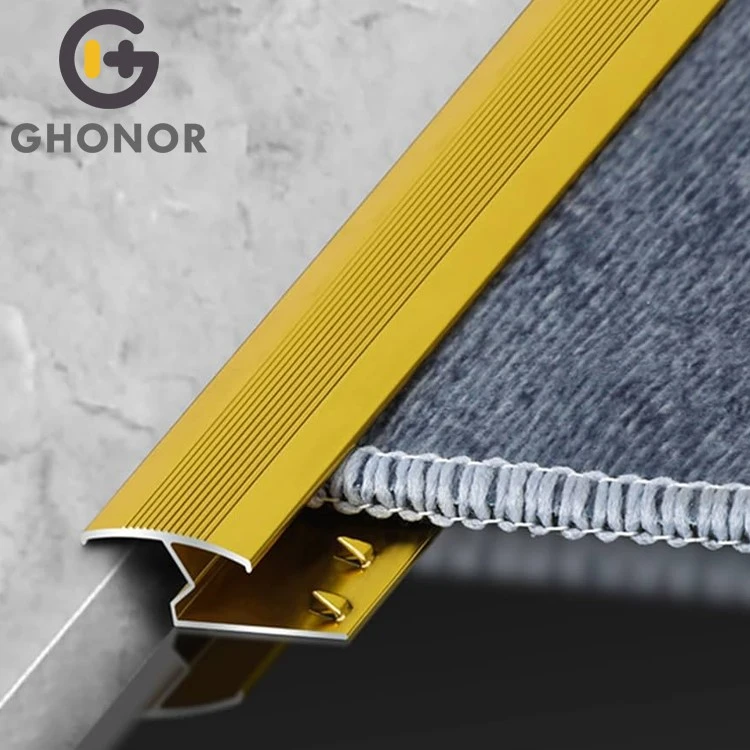
For most standard residential or light commercial ramps (like those leading to a porch or small retail entry), the Z Strip Carpet Transition is an excellent choice. This trim gets its name from its Z-shaped base, which slides neatly under the edge of the ramp's carpet, holding it securely in place while the top edge sits flush against adjacent flooring. It's low-profile, which is perfect for ramps where minimizing height differences is critical for wheelchairs, strollers, or shopping carts. For ramps that have a very subtle slope or where you need extra visibility to mark the ramp edge, our Carpet Aluminum Edge Trim is another great option. This type of trim has a raised, decorative lip that follows the contour of the ramp, helping to define the edge so no one misses the transition. If you're working on a ramp that connects to two different types of flooring (say, carpet in a living room and tile on a porch), the Aluminum Carpet Transition Strip is versatile enough to bridge both, with a flexible design that adjusts to slight height mismatches between surfaces. And for high-traffic commercial ramps-like those at office buildings, warehouses, or grocery stores where carts and dollies roll over constantly-our Aluminum Carpet Edge Trim (a heavier-gauge version designed for durability) will stand up to years of heavy use without bending or chipping. You can explore all these options in more detail on our website, and if you're unsure which is right for your ramp, our team is always happy to help match you to the perfect trim.
Before you grab your tools, it's important to do a little prep work to make sure your installation goes smoothly. Skipping these steps is where many DIYers run into trouble. First, measure the exact length of the transition point where the ramp meets the adjacent flooring. You'll want to cut your trim to within 1/8 inch of that measurement to leave a small gap for expansion-aluminum expands slightly with temperature changes, so leaving even a tiny space will prevent the trim from buckling in hot weather or contracting in cold weather. Next, clean the entire transition area thoroughly: use a degreaser to wipe down the ramp's top edge and the adjacent floor, then vacuum any dirt, dust, or loose carpet fibers from the surface. Any debris left under the trim will create an uneven surface that can cause tripping or make the trim come loose over time. Finally, check the slope of the ramp at the transition point. Most ramps have a gentle slope (1:12 is the standard for accessibility), but even a few degrees of unevenness can throw off your trim fit. If the ramp's edge is slightly higher or lower than the adjacent floor, you can use a small amount of floor leveling compound to fix that-just make sure it's fully dry before moving on.
Now, let's get to the installation. I always recommend working on a dry, mild day if your ramp is outdoors, as humidity or extreme temperatures can affect adhesive strength and aluminum's flexibility. For most aluminum floor carpet trim installations, we use a heavy-duty construction adhesive made for metal and flooring-epoxy-based adhesives work best for ramps, as they create a permanent, weather-resistant bond. Here's the step-by-step process:
-
1. Dry Fit the Trim First
This is a non-negotiable step that saves so many headaches later. Lay your cut trim along the transition point, pressing it firmly into place to check for gaps, unevenness, or interference with the ramp's carpet. If you're using a Z-strip type, make sure the bottom leg of the Z sits flat against the adjacent floor and the top leg slides easily under the ramp's carpet without pulling it taut. If it doesn't fit, you can adjust the trim by gently bending it (aluminum is flexible enough for minor adjustments) or trimming a tiny bit more off the end. Never skip dry fitting-once you apply adhesive, you only get one shot to line everything up. -
2. Prepare the Trim for Adhesion
Aluminum is a smooth metal, so adhesive won't stick as well if the surface is glossy. Use a piece of fine-grit sandpaper (80-120 grit) to lightly scuff the bottom of the trim that will sit on the floor and the side that will attach to the ramp's edge. This creates tiny ridges that the adhesive can grip onto, making the trim way more secure. Wipe the trim down with a damp cloth to remove sanding dust, then let it dry completely for 5 minutes. -
3. Apply Adhesive
Follow the instructions on your epoxy adhesive, but generally, you'll want to apply a ¼-inch bead of adhesive along the entire length of the trim's bottom edge (the part that sits on the adjacent floor) and along the back edge that will attach to the ramp. Don't use too much adhesive-excess will squeeze out from under the trim and be hard to clean up, and it can create an uneven surface. If you're working with a long ramp (over 6 feet), apply the adhesive in 2-foot sections rather than all at once. This gives you time to line up the trim before the adhesive starts to set. -
4. Secure the Trim in Place
Carefully lower the trim onto the transition, pressing it firmly from one end to the other to squeeze out any air bubbles. Wipe away any excess adhesive that squeezes out with a damp cloth before it dries-dried epoxy is nearly impossible to remove from carpet or flooring. Once the trim is in place, you'll need to hold it down while the adhesive cures. For standard ramps, a few heavy objects like cinder blocks or filled buckets placed along the trim for 24 hours should do the trick. If your ramp is in a high-traffic area, you can also add a couple of small, hidden screws (drilled through the trim's surface and into the floor) for extra support-just make sure the screws are countersunk so they don't create a trip hazard. If you're using a trim that slides under carpet (like the Z-strip), you can skip the screws on top, but I still recommend a few small screws along the back edge where it attaches to the ramp's edge for long-term stability. -
5. Secure the Ramp's Carpet
If you're using a Z-strip or a trim that wraps under the ramp's carpet, you'll need to tuck the carpet edge into the trim's channel. Most of these trims have a narrow slot along the top where you can slide the carpet's raw edge. Use a flathead screwdriver or a carpet tucker to gently press the carpet into the slot, making sure it's evenly aligned along the entire length. Trim any excess carpet from the edge with a utility knife, being careful not to cut into the trim or the adjacent flooring. This step is important because it keeps the ramp's carpet from fraying over time, which can lead to loose fibers getting stuck in wheelchairs or shopping cart wheels. -
Once your trim is installed, let it cure for the full time recommended by the adhesive manufacturer (usually 24 hours for epoxy, 12 hours for construction adhesive) before using the ramp. After curing, do a quick walk test: roll a chair, cart, or even a heavy box over the transition to make sure it's stable and doesn't shift. Check for any gaps or unevenness, and touch up any areas if needed.
I've installed countless aluminum floor carpet trim on ramps over the years, and a few pro tips have become go-to tricks that I wish I'd known for my first project. First, if you're installing trim on an outdoor ramp, look for an aluminum trim with a powder-coated finish-this resists rust and fading from sun and rain, so it will look good and function well for years. Our Aluminum Floor Carpet Trim comes in several powder-coated colors, so you can choose one that matches your ramp or flooring for a seamless look. Second, for ramps with curved edges (like a ramp leading to a circular porch), you can bend flexible aluminum trim to fit the curve-just heat it gently with a heat gun (hold it 6 inches away to avoid melting the finish) while you shape it, and it will hold the curve perfectly. Third, if your ramp has high foot traffic (like a commercial loading ramp), invest in a heavier-gauge aluminum trim-thinner trim can bend under repeated heavy loads, but our heavy-duty options are designed to withstand thousands of passes without damage.

Another common question I get is about maintaining aluminum floor carpet trim on ramps. The good news is that it's almost maintenance-free! All you need to do is sweep or vacuum the trim regularly to remove dirt and debris, and wipe it down with mild soap and water if it gets stained. Avoid using harsh chemicals or abrasive cleaners, as they can scratch the powder-coated finish. Once a year, you can inspect the trim to make sure there are no gaps or loose edges, and touch up the adhesive if needed. This simple maintenance will keep your transition safe and looking great for decades.
At the end of the day, installing aluminum floor carpet trim on a ramp is one of the most effective ways to improve safety, extend the life of both your ramp and adjacent flooring, and add a polished finish to your space. Whether you're a homeowner looking to fix a trip hazard at your back door, a small business owner updating your store's entry, or a contractor working on a commercial project, having the right trim and following these steps will make the job easy and long-lasting.
If you're ready to pick out the right trim for your ramp, our website has a full range of options to suit every need and budget. We carry everything from lightweight residential trims to heavy-duty commercial grades, and our product pages have detailed specs, installation guides, and customer reviews to help you make the best choice. Whether you're looking for a low-profile Z strip, a durable edge trim, or a versatile transition strip, we have you covered.

If you have questions about installation, need help measuring your ramp, or want to place a bulk order for a project, our team is here to help. We've worked with thousands of clients on all types of ramp projects, and we can provide personalized advice to make sure your aluminum floor carpet trim installation goes smoothly. Don't let uneven transitions create safety hazards or make your space look unfinished-reach out to us today to start your project.
References
- Metal Transition Strip Installation Guide, American Building Supply, 2024
- Access Ramp Safety Standards, Americans with Disabilities Act (ADA), 2023
- Aluminum Trim Maintenance Best Practices, Metal Building Materials Association, 2024