

If you've ever tackled a flooring project, you know how frustrating a mismatched transition can be. Whether you're blending hardwood, vinyl plank, tile, or concrete, a properly cut floor transition strip is the unsung hero of a polished, professional finish. As a long-time floor transition strip supplier who's worked with contractors, DIYers, and homeowners for years, I've seen first-hand how a botched cut can turn a smooth-looking install into a dated, trip hazard. The good news? Cutting vinyl floor transition strips isn't as tricky as it sounds-if you use the right tools, follow a few key steps, and skip the common mistakes that lead to uneven cuts or cracked strips.
First, let's make sure we're on the same page about what a vinyl floor transition strip is, and why cutting it correctly matters. These strips come in a range of styles, but they're designed to bridge the gap between two different floor surfaces, level out height differences, and add a clean, finished edge. Some of the most popular options we stock include the versatile Aluminium Floor Transition Strip, the sleek Black Aluminum Transition Strip for modern interiors, and the practical Aluminium Reducer Strip for bringing hardwood and vinyl together seamlessly. Vinyl transition strips, while often flexible, still require precise cuts to fit gaps of any size-too short, and you'll have gaps that collect dust or debris; too long, and you'll have to force it into place, which can cause warping or breakage.
Before you pick up a tool, prep is everything. I can't tell you how many times I've heard customers say, "I just grabbed a strip and started cutting"-big mistake. The first step is measuring the gap where the transition will sit. Start by laying the uncut strip over the gap (hold it level, not tight, because floor expansion is a real thing-vinyl can expand and contract with temperature and humidity changes, so leaving a 1/8-inch gap at each end is non-negotiable). Use a tape measure to mark the exact length you need, then add that measurement to your strip. Wait, why not just cut the strip to the exact gap length? Because if the strip is too tight, it can buckle or pull away from the flooring over time. A 1/8-inch gap might seem small, but it's the difference between a strip that lasts 5 years and one that lasts 15.
Next, mark your cut line clearly. I recommend using a fine-point marker or a pencil to draw a straight line across the strip. To avoid uneven cuts, clamp the strip to a workbench or a flat surface so it doesn't shift while you're cutting. If you don't have a workbench, a sturdy piece of plywood on sawhorses works just as well. For extra precision, you can use a speed square or a straight edge to guide your line-this is especially important if you're cutting a cove-shaped profile, like our Aluminium Cove-Shaped Profile, which has a curved edge that needs to stay smooth to fit against baseboards or flooring.
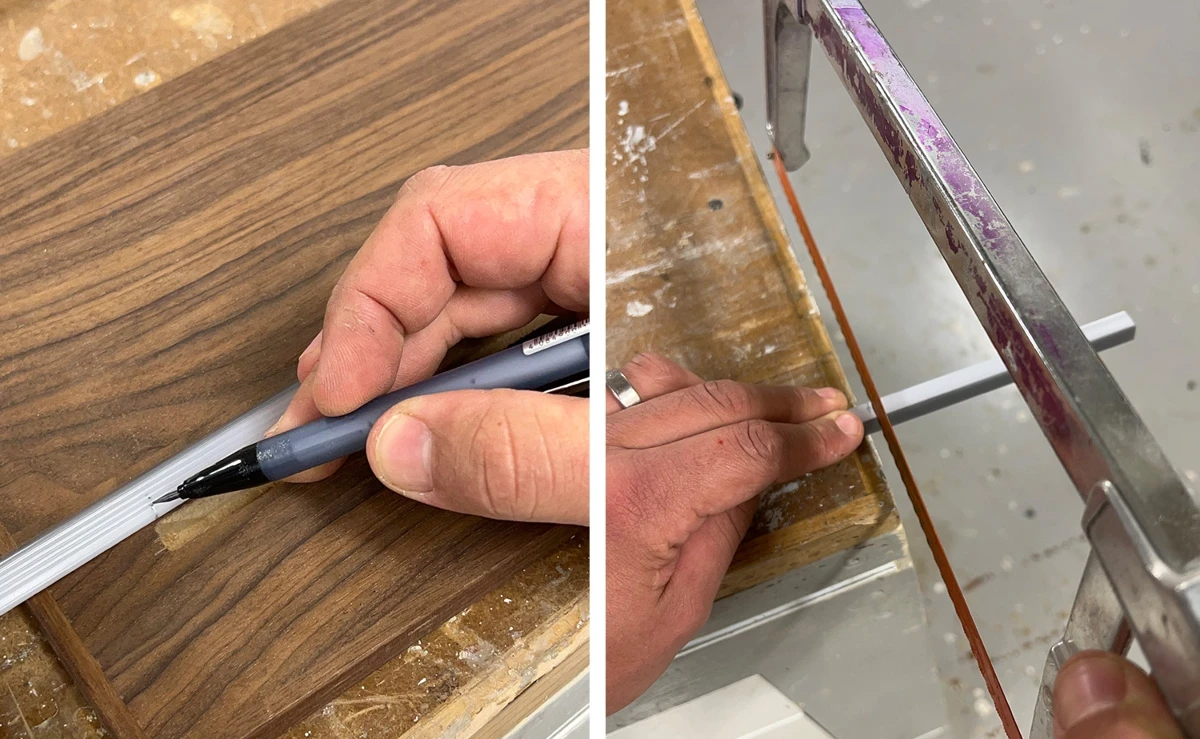
Now, the tools: the right tool for the job will make your cut clean and straight, without damaging the vinyl or any metal components if your transition strip has a metal core. For vinyl floor transition strips, the best tools are a miter saw with a fine-tooth blade (80 teeth or more), a hacksaw with a bi-metal blade, or a vinyl cutter tool (the kind used for DIY vinyl plank projects works great too). Let's break down each option: a miter saw is perfect for straight, long cuts-set the saw to 90 degrees for a straight cut, and make sure the blade is sharp. A dull blade will tear the vinyl, leaving rough edges that you'll have to sand later. If you don't have a miter saw, a hacksaw is a budget-friendly option: use a slow, steady back-and-forth motion, don't force the blade, and keep the strip clamped tight to avoid slipping. For small, detailed cuts (like trimming a strip to fit around a door jamb), a vinyl utility knife works well too-score the line multiple times, then snap the strip along the mark.
A common mistake when cutting vinyl transition strips is not accounting for the height of the flooring. If you're transitioning between two floors of different heights (like vinyl plank and tile), your transition strip needs to be cut to match that height difference. For example, if your tile is ¼ inch higher than your vinyl, a reducer strip will slope from one surface to the other, so your cut needs to be angled slightly to follow that slope. This is where a miter saw's ability to adjust angles comes in handy-set the saw to a shallow angle (usually between 2 and 5 degrees) to create a smooth slope, not a steep drop. If you cut the angle too steep, the transition will look lumpy and feel uneven underfoot. For curved transitions, like around a room corner, you can score the vinyl strip with your utility knife, then bend it slowly to fit the curve-just make sure to test the fit before making your final cuts.
Once you've made your cut, the finishing touches will make the difference between a DIY-looking install and a professional one. Start by sanding the cut edge lightly with 220-grit sandpaper to smooth any rough spots or burrs. If your transition strip has a metal edge (like our Aluminium Floor Cover Strip, which has a durable aluminum top), you can also clean the cut edge with a soft cloth and rubbing alcohol to remove any sawdust or marker stains. Test the fit by laying the strip in the gap-if it's too loose, you can add a small amount of adhesive (we recommend a pressure-sensitive adhesive designed for flooring transitions) along the bottom of the strip before pressing it into place. If it's too tight, don't force it-trim a little more off the end, or sand the edge slightly until it fits snugly.
Another thing to keep in mind: vinyl transition strips come in different thicknesses, so make sure your tools are suited to the thickness of the strip you're working with. Thinner strips (under ¼ inch) work great with a utility knife or a fine-tooth hacksaw, while thicker, heavy-duty strips (used for commercial spaces) need a miter saw with a carbide-tipped blade to avoid bending or breaking. If you're working on a large project, always test the cut on a spare strip first-this will help you adjust your technique before cutting the strips that will go in your space.
Wait, what about corners and odd-shaped spaces? I get it, not every transition is a straight line. For example, if you're transitioning between two rooms that meet at a 90-degree corner, you can cut your transition strip at a 45-degree miter to meet neatly. To cut a miter, set your miter saw to 45 degrees, clamp the strip securely, and make the cut. For internal corners (where two walls meet and the transition strip turns inward), you'll need to cut the strip with a notch to fit around the corner-measure the depth of the corner, mark the notch, and cut it carefully with a utility knife or a small jigsaw. If you're not comfortable cutting notches, you can also use two shorter strips and a corner connector, which we also supply for all our transition strip styles.
As a transition strip supplier, I've seen so many customers overcomplicate cutting vinyl strips, but it's really a simple process when you have the right prep and tools. The key is to measure twice, cut once, take your time, and test the fit before you finalize the install. Whether you're a DIY homeowner tackling a bathroom remodel or a contractor working on a multi-unit project, a perfectly cut transition strip will elevate your flooring job, prevent trip hazards, and extend the life of your floors by keeping debris out of the gaps.
If you're shopping for vinyl or metal floor transition strips for your next project, we carry a wide range of styles to suit every need-from the durable Aluminium Floor Transition Strip for high-traffic areas to the stylish Black Aluminum Transition Strip that adds a modern touch to any space. We also stock Aluminium Reducer Strips, Aluminium Cove-Shaped Profiles, and Aluminium Floor Cover Strips, all made with high-quality materials to resist wear, fade, and moisture. No matter what your project size or style is, we have the right transition strip for you.
If you're ready to purchase transition strips for your project, or have questions about which style is best for your flooring, feel free to reach out to our team to discuss your needs. We're here to help you get the right products and tips to make your flooring install a success, no matter your experience level.
References:


- Flooring Contractor Association. (2022). "Best Practices for Floor Transition Installation." Professional Flooring Journal.
- National Home Improvement Council. (2023). "DIY Flooring Tools and Techniques." Home Improvement Research Report.
- Metal Fabrication and Supply Association. (2021). "Aluminum Transition Strips: Durability and Applications for Residential and Commercial Flooring." Industrial Materials Review.
- Vinyl Flooring Manufacturers Association. (2022). "Transition Strip Selection and Cutting Guidelines for Vinyl Plank and Sheet Flooring." Flooring Installation Standards Guide.