

If you've ever tackled a home renovation project-whether it's updating your bedroom, hallway, or even a small rental space-you know how frustrating adhesive-related mishaps can be. Maybe you've spent hours scraping old glue off a concrete subfloor, only to discover it leaves stains you can't get rid of, or you've dealt with a trim that shifted because the adhesive wasn't applied evenly, leaving a tripping hazard. As a supplier of high-quality metal transition solutions, I get these pain points all the time. Today, I'm breaking down how to install Aluminum Floor Carpet Trim without adhesive- a method that's faster, cleaner, and way more reliable for long-term use. No more glue, no more mess, just a tight, professional finish that lasts.
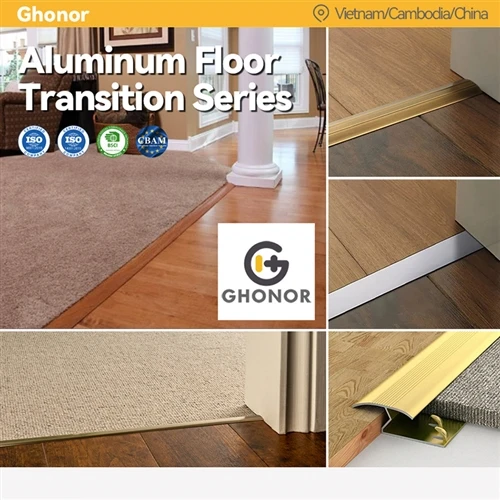
Before we dive into the steps, let's talk why adhesive-free installation is worth considering. Adhesives come with hidden costs: toxic fumes that require ventilation, drying times that delay your project, and the headache of removal if you ever need to replace your carpet or trim. Aluminum, on the other hand, is lightweight, corrosion-resistant, and durable-perfect for high-traffic areas like entryways, hallways, or between a carpeted living room and a tiled kitchen. Our Aluminum Floor Carpet Trim is engineered specifically for this no-glue application, with a design that locks into place securely.
First, let's gather the right tools and materials. You won't need a caulking gun or adhesive tubes here-just a few basic items most homeowners already have. Here's what you'll need:
- A measuring tape to get precise dimensions (always measure twice, cut once!)
- A miter saw or a pair of aviation snips to cut the trim to length. Aluminum is soft enough to cut with hand tools if you don't have power equipment, which makes this project accessible for beginners
- A tape or chalk line to mark your cutting and installation lines clearly
- A flat pry bar to remove old trim or excess carpet padding if you're working on a renovated space
- A rubber mallet-this is key for securing the trim without damaging it
- A vacuum to clean the subfloor before installation (dust and debris will prevent a tight fit)
- Optional: a small wood block to protect the trim when tapping, especially on edges that are near wood floors.
Now, let's cover the prep work-this is where the success of your adhesive-free install lives. You can't just set trim on a dirty subfloor and expect it to stay. Start by removing any existing carpet, old trim, or glue residue. Use your pry bar carefully to avoid damaging the subfloor-if you have concrete, a putty knife works well to scrape away stubborn bits, then vacuum thoroughly until the surface is smooth and free of dust. Next, measure the exact length of the gap or edge where you'll be installing the trim. For example, if you're transitioning between a 10-foot carpeted hallway and a tile floor, measure the full length of the carpet edge you need to cover. Double-check this measurement-our Aluminum Carpet Edge Trim and other products come in standard lengths, but cutting them to your exact needs ensures a seamless fit.

Once your subfloor is prepped and measured, it's time to cut the trim to size. Lay your Aluminum Floor Carpet Trim on a flat surface, mark your cut line with a pencil, then use your miter saw or aviation snips to cut along the line. If you're cutting corners (like at a doorframe), use a 45-degree miter cut for a clean, finished look. Pro tip from our team: always leave a tiny 1/16th of an inch gap at the ends of the trim if you're installing it near walls or door casings-aluminum expands slightly with temperature changes, and this small gap prevents the trim from warping or bending over time.
Now the fun part: installing without adhesive. There are two main methods that work best, depending on your subfloor type-we'll cover both, since different projects have different needs.
The first method is for wooden subfloors (plywood, OSB, or particleboard). This is super straightforward. Once your trim is cut to size, line it up exactly where you want it. The trim has two parts: a top "cap" that covers the edge of the carpet, and a bottom "base" that sits against the subfloor. For wooden subfloors, you'll use small finishing nails or screws to secure the base of the trim. Drill tiny pilot holes into the bottom flange of the trim (this prevents the aluminum from splitting) every 12 to 16 inches along its length. Then, drive the nails or screws into the wooden subfloor to hold the base firmly in place. Once the base is secure, press the top cap of the trim down until you hear a click-this locks it over the base, covering the raw cut edge of the carpet and creating a smooth transition. This method is perfect if you want extra stability in high-traffic areas, and you can adjust the nails slightly if you need to tweak the fit before locking the cap.
The second method works for concrete or tile subfloors-no drilling, no nails, just a friction fit. This is where our Aluminium Carpet Threshold Strip design shines, because it has a unique interlocking base that grips tight without fasteners. First, line up the trim with the edge of your carpet, making sure it's straight. Then, using your rubber mallet and a wood block to protect the trim, gently tap the entire length of the trim along its sides and ends. The base of the trim is slightly flexible, so tapping it will press it firmly against the concrete, creating enough friction to hold it in place. For extra security on long runs, you can use two small, heavy-duty double-sided tape strips (just on the very ends of the trim, not along the entire length) before tapping-this is a tiny amount of tape that's only for temporary positioning, not adhesion. If you ever need to remove the trim later, the tape will peel off easily without leaving residue, which is a huge plus for renters or homeowners who might want to update their space down the line.
Wait, what about the carpet edge? You need to make sure the carpet is tucked properly under the trim to avoid gaps or fraying. Once your Aluminum Floor Carpet Trim is secured, take the raw edge of the carpet and tuck it into the channel of the trim that's designed to hold it. Most of our transition strips have a small, raised lip that locks the carpet edge in place, so you don't have to worry about it shifting. If the carpet is too thick, you can trim the very edge with a sharp utility knife-just be careful not to cut into the fibers. A neat, tucked carpet edge is the final step to a professional look, and it also prevents the carpet from unraveling over time.
Now, let's go over common mistakes to avoid, because even a no-adhesive install has small pitfalls that can ruin your finish. First, measuring wrong. It's easy to rush this step, but if your trim is too short, you'll have a gap in the transition; if it's too long, it won't fit neatly into corners. Second, not prepping the subfloor properly. A dusty or uneven subfloor will make the trim wobble, and even the best friction fit won't hold. Take 10 extra minutes to vacuum and wipe the subfloor with a damp cloth, then let it dry completely before installing. Third, using too much force when tapping. Aluminum is durable, but it can dent if you hit it too hard. Always use a wood block between the mallet and the trim to distribute pressure evenly. Fourth, forgetting the expansion gap. As I mentioned earlier, aluminum expands in hot weather and contracts in cold, so leaving that tiny gap at the ends of the trim is non-negotiable. Skip that, and you might end up with a bent trim that looks sloppy.
Why does this method work so well for our products specifically? As a supplier, I test every one of our Aluminum Carpet Transition Strip lines to make sure they hold up to years of foot traffic, spills, and temperature changes. Unlike plastic transition strips, which can crack or shift, our aluminum strips are designed to stay rigid and secure without adhesive. I've seen customers use these in entryways where people track in snow and mud, and they still look like new after three years. No more scraping glue, no more re-applying adhesive, just a one-time install that lasts.
Maybe you're wondering if this is only for professionals. Absolutely not. I installed one of these Aluminum Floor Carpet Trims in my own hallway last year, and I'm not a handy person by trade. I followed the steps, took my time with measurements, and had it done in about an hour-way faster than waiting for adhesive to dry. When it came time to touch up my carpet later, I was able to remove the trim in 5 minutes, no damage to the subfloor, no leftover glue mess. That's the beauty of adhesive-free installation: it's flexible for whatever your project needs down the line.
Let's also talk about cost, because that's a big factor for many homeowners. Adhesive kits cost extra, and if you make a mistake, you have to buy more adhesive. With our Aluminum Floor Carpet Trim, you only need the trim, a few basic tools you probably already own, and that's it. No extra supplies, no hidden fees. And because aluminum is more durable than plastic, you won't have to replace it in 2 or 3 years-this is a one-time investment that pays off.
I always tell customers that the best part of using aluminum transition strips is the clean, sleek look. Unlike wooden strips that can warp or scratch, aluminum has a smooth, uniform finish that complements any decor-from modern farmhouse to minimalist industrial. Whether you're transitioning between carpet and tile, carpet and wood, or even two different types of carpet, our range of products has you covered. Our Carpet Aluminum Edge Trim comes in different widths to fit thin or thick carpet, so you can find the perfect match for your space.
If you're ready to tackle this project, don't overcomplicate it. Take it step by step, prep the subfloor thoroughly, and use the right tools. Remember, the key to a successful adhesive-free install is a tight fit-slow and steady tapping, precise measurements, and a clean surface. If you run into questions mid-project, our team is here to help. We've worked with homeowners, contractors, and renovators of all skill levels, and we can offer tips specific to your subfloor or project size.
Whether you're updating a small space in your home or working on a larger renovation, installing Aluminum Floor Carpet Trim without adhesive is a game-changer. It saves time, saves money, and gives you a durable, professional finish that stands the test of time. No more adhesive headaches, no more messy cleanup-just a secure transition that keeps your carpet edges neat and your floors safe from tripping hazards.
If you're interested in browsing our full selection of aluminum transition strips or have questions about which product is right for your project, reach out to our team to discuss your needs and get more information. We're here to help you get the job done right, without the hassle of adhesive.
References
- Aluminum Transition Strip Installation Guide. Metal Flooring Accessories Association, 2022.
- Corrosion Resistance Properties of Aluminum for Residential Flooring Applications. Journal of Construction Materials, vol. 18, no. 3, 2021, pp. 45-52.
- Home Renovation Project Cost and Time Analysis: Adhesive vs. Adhesive-Free Trim Installation. DIY Home Improvement Research Group, 2023.